


Kajabi Quick Tips: How To Create a One Page Website Menu for Kajabi's Landing Pages or Website Pages
Aug 24, 2023Welcome to Kajabi Quick Tips, your regular dose of Kajabi inspo!
Each week I share actionable Kajabi tutorials and tips that are quick and easy to implement.
Use the step-by-step guide below or watch the video below if you prefer to see what's happening on screen.
You'll learn more about Kajabi one quick tip at a time, so you can master the platform that runs your online business!
Just a heads up
Blog Posts from at The Unicorn Advisory may contain affiliate links, but I’m a no bullshit affiliate kinda gal, as you can read about in my affiliate disclaimer.
I only share products and services we use and love and would recommend, if there was affiliate program or not.
The few $$ we make from affiliate income, costs you absolutely nothing and goes straight to our family holiday fund ✈️ so my kids and I thank you💗
How to set up Kajabi Menu Jump-Links
Creating a menu for your Kajabi pages, that jumps to different sections of the page, can be a tricky challenge, as there is no option to do that easily in Kajabi.
You can use buttons on the page itself to jump to sections:
But you can't do that easily via a menu.
Thankfully there is a simple workaround, using a two-step process and in this Kajabi tutorial video, you'll learn all the steps and be able to create a header menu for your page in less than 10 minutes.
These menus can be used for simple one-page websites (perfect if you don't want to build multiple pages!) or for adding additional navigation to long sales pages, so viewers can jump to the exact info they need on the page.
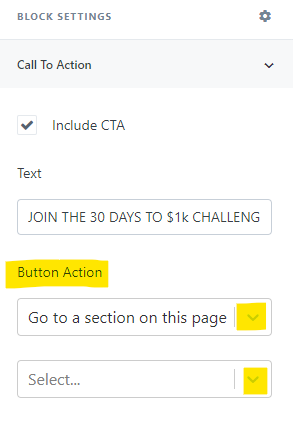
Simply create a temporary section on your page with buttons that link to the sections of the page you want (using the action - go to a section on the page).
Save, then preview your page, and right click on each button to get the URL for the button (which will be a longer than usual link, as it is adding the specific section to the URL).
Copy and paste those into a doc, or open another window, so you can go through each one and add it to your custom menu.
You can then create a custom menu (under website > navigation) using those URL's, so it will link right to that specific part of the page, no buttons needed!
Once you've got your menu sorted and jump links saved, just hide that section on your page. Don't delete it, just hide it, in case you want to get the links again in future.
You can also share these links on social media, when you want to direct someone to a specific section of the page.
Prefer to watch on video?
View this step-by-step Kajabi Quick Tip on video, if you'd prefer a start-to-finish screenshare tutorial.
Whether you're a beginner or an experienced Kajabi user, this video ⬇️ is packed with valuable insights to help you make the most of Kajabi's features.
(Please note: I didn't mention it at the end of the video, but once you have made your menu - you can hide the temporary "button" section you created on your page to make the links, so it doesn't show up) 👍
Want extra Kajabi help?
If you've got Kajabi questions, please let me know what they are. Your question may become a future quick tip or tutorial 👍
Click Here to request a tip

Cheers, Sue x
Your Trusted Kajabi Expert 🦄
Discover the secrets to using Kajabi like a pro! 🤫
Get a Kajabi Quick Tip in your inbox twice a week
We promise to keep your email and personal info safe. Unsubscribe at any time 🤍